Cheesy Scalloped Potatoes and Ham

I love scalloped potatoes, but get inpatient waiting for them to bake.  I came up with an easy way to make scalloped potatoes in my electric skillet with about half the usual cooking time.

Potatoes and onions in skillet.

2 lbs. potatoes (about 6)
3 tablespoons butter or margarine
3 tablespoons all purpose flour
Salt and pepper for seasoning
2 ½ cups milk
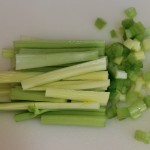
½ cup finely chopped onion, optional
1 cup cooked ham, cubed or
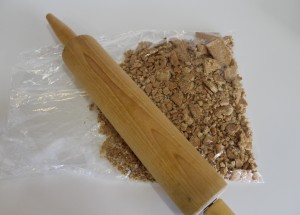
1 ea. 5 oz. can smoked ham
½ cup shredded cheddar cheese

.

Flour and butter bubbling nicely.

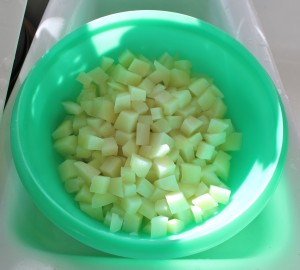
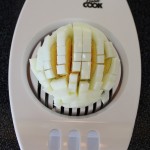
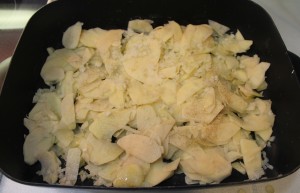
Peel potatoes and slice thinly. [I put the peelings in the composter.]  Add a little oil to the electric skillet. Set on lowest setting, about 150°.

Add potatoes and onions to skillet.  Turn occasionally as you’re preparing the white sauce. This speeds up the cooking process as the potatoes are about half done by the time the sauce is ready.

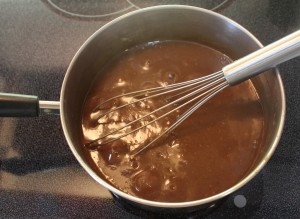
Melt butter in 2 qt. saucepan over low heat.  Blend in flour using a whisk.

Stir well to coat
Stir well to coat.

Continue cooking over low heat, stirring until mixture is smooth and bubbly.  Add milk.  Increase heat to medium high.  Stir constantly until mixture begins to boil.  Boil and stir 1 minute. Remove from heat.

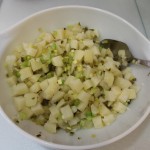
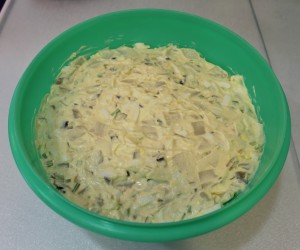
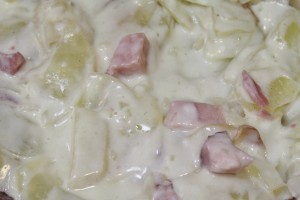
Add ham to skillet.  [If you’re using canned ham, use two forks to shred and pull it apart in a small bowl before adding to skillet.]  Pour sauce over potatoes, onions and ham.  Mix well.  Put lid on skillet and check every 10 minutes to stir and turn the potatoes.  Cooks in 30 – 40 minutes.

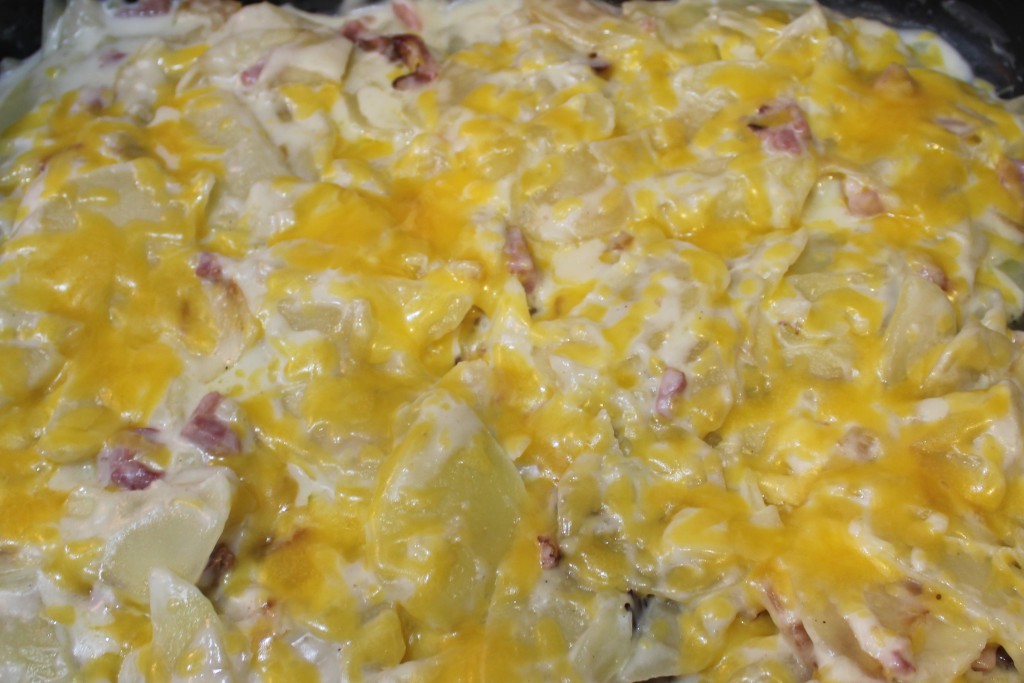
When potatoes reach the desired doneness, turn off the electric skillet. Add cheddar cheese and put the lid back on (to speed up melting of cheese.)

The cheddar melts in 3 – 5 minutes.


Cheesy Scalloped Potatoes and Ham
Cheesy Scalloped Potatoes and Ham – Ready to dish up and enjoy.

*A note about electric skillets.

Recently, I replaced my old faithful skillet with one of those where the cooking pan lifts off from the heating base.  It was a little more expensive than the other models, but I thought the removable base was worth the added expense.  Wrong.  It lasted exactly one use of frying chicken at 350°, then warped.

So buyer beware.  You do get what you pay for.  The more expensive skillets with removable bases may not warp, but my relatively inexpensive (50.00-60.00) did.

.


©2016, My Granny Rocks | Janette Thornton. All rights reserved.

Roast Beef from the Crockpot

This is my favorite way to prepare a beef roast.  The meat is tender.  The carrots have a beefy flavor and the broth makes the best tasting gravy.  It seems like most supermarket meats are just packed with water anymore, so I only use a little water to prevent scorching at the beginning.  Since I’m using condensed soup, I don’t add any salt to the roast.

Whenever using a crockpot, remember vegetables first, meat on top.

Onions on Bottom
1. Onions first on bottom of crockpot.

3 – 4 lb. beef roast
1 lb. baby carrots
¼ cup chopped onions
2 – 3 tablespoons minced garlic
1 can beefy mushroom condensed soup
¼ cup water
Pepper


Carrots Next
2. Carrots next. Add 1/4 cup water.

GRAVY
½ cup cold water
2 tablespoons flour
2 tablespoons cornstarch
¼ teaspoon Kitchen Bouquet sauce
2 cups beef broth (from crockpot)


Roast on top of carrots
3. Roast on top of carrots. Sprinkle with pepper.
Add garlic on roast.
4. Add garlic on roast.


Pour beefy mushroom soup on roast.
5. Pour beefy mushroom soup on roast.

If so desired, quartered potatoes can be added around the roast.  Turn crockpot on low and let cook for 7 to 10 hours.  If you’re around the house, turn the meat over about half way through the cooking time.

When done, transfer roast and carrots to shallow bowl or plate.  Cover with aluminum foil to keep warm while you prepare gravy.


Transfer to bowl or plate and cover while preparing gravy.

GRAVY

Good Brown Gravy
Good Brown Gravy

Measure 2 cups of broth and put in a 2 qt. sauce pan.  If you don’t have quite enough broth, add water to make 2 cups.  [I don’t strain the broth since the onions and mushroom bits add a lot of flavor to the gravy.]  Bring the broth to a good rolling boil.  While the broth is heating, combine ½ cup water with the cornstarch and flour in a pint sized canning jar.  [Put the water in first, then the cornstarch and flour.]  Shake to mix well until no lumps remain.  [I use a combination of cornstarch and flour when I make this type of gravy.]

Stirring constantly, slowly add the flour mixture to the boiling broth. Continue stirring as the gravy thickens.  Simmer for 5 minutes or so to allow time for the flour to cook.  Stir in Kitchen Bouquet and gravy’s done!

If you have any leftovers, save them for tomorrow’s hot roast beef sandwiches!


©2016, My Granny Rocks | Janette Thornton. All rights reserved.

Dill and Onion Buns

These buns have a very mild dill flavor with a hint of onion.  I wanted something a little different, so I changed up my basic bun recipe.  The flavor wasn’t as strong as I expected, so I’ll try increasing the dill seed next time for a stronger flavor.  It can be difficult to get to that ‘just right’ point – lots of flavor, but not over powering.


1 package active dry yeast, (2 ¼ teaspoons) room temperature

1 ¼ cup warm milk (110° F to 115° F) [Check the temperature with an insta-read thermometer. I combine the milk and honey and warm in the microwave.]

1 teaspoon white sugar

¼ cup honey [Use a liquid measuring cup.]

3 tablespoons butter, melted [Olive oil can be substituted.]

1 or 2 tablespoons butter, melted

1 large [or extra large] egg, room temperature

½ tablespoon Kosher salt [Do not use table salt. it measures differently due to size of granules.]

1 tablespoon minced onion, dried

½ teaspoon dill seed

1 teaspoon dill weed

½ cup whole wheat flour*

3 to 4 cups all-purpose flour

Dough doubled in size
Dough has doubled in size.

Combine yeast, milk, sugar and honey.  Mix well to dissolve yeast.  Let sit about 5 minutes to allow yeast to bloom.  Add 3 tablespoons melted butter, egg and 2 cups of flour.  Mix on low with dough hook until smooth. Add remaining flour as needed until dough comes together.  [For me, I always use all the flour.]

Add salt.  Knead 7 – 9 minutes with hook until dough is tacky – not sticky.

Place in greased bowl.  [Bowl should be at least a 2-qt.]  Cover with light-weight dish towel.  Let rise until doubled about 1 hour.  Check after 45 minutes.

Buns shaped into varying sizes.

Grease a 11” x 15” cookie sheet with Crisco for rolls or a 11″ x 17″ size for hamburger buns.  Roll or press dough on floured board, into rectangle about 1” to 1½” thick.  Shape into 24 pieces for rolls or 15 pieces for medium sized hamburger buns [or a combo of sizes, depending on what type of buns you want.]  Put on greased cookie sheet.  Cover again with the dish towel and let rise until doubled 45 to 60 minutes.

Buns ready to bake.
Buns ready to bake.

Bake 12 – 15 minutes until golden brown in 350° oven.  Remove from oven.  Brush with 2 tablespoons melted butter.


*Don’t fret if you don’t have any whole wheat flour on hand, you can use 4 ½ cups of all-purpose flour.


©2016, My Granny Rocks | Janette Thornton. All rights reserved.

Porcupine Meatballs – Microwave

You know, the later in the week it gets, the less I feel like cooking after work.  These meatballs are quick and easy.  We like them with slices of cheddar cheese, crackers and corn-on-the-cob for a quick supper.

1 lb. lean hamburger or ground chuck
1 cup Minute Rice, uncooked (white or brown)
1 can (10 oz.) condensed tomato soup
1 egg, slightly beaten
½ cup water
1 teaspoon onion or garlic salt
1 tablespoon Worcestershire sauce
2 tablespoons catsup or ketchup
1 teaspoon yellow mustard

Combine ground beef, about ½ can of soup [I spoon it right out of the can.], egg, water, salt, and Worcestershire sauce.  Add rice.  Mix well.  Let mixture set for 5 – 10 minutes.  [This lets the rice absorb the water.  At this point, you can cover and refrigerate several hours until ready to cook.] Shape into small balls (about a tablespoon each).  [I use a small scoop for this.]  Arrange in a circle on a microwave meat platter or a large glass pie pan.  Cover with wax paper.

Meatballs Ready for Topping

Microwave at full power for 4 minutes; rotate meatballs on platter so what was facing in towards the center is now facing out towards the perimeter.  Cover waxed paper.  [You can re-use the piece you already used.]

Return to microwave for 3 minutes.  Using tongs, move meatballs to a serving platter.  Form the remaining meat into balls, cook as above and transfer to serving platter.  The meatballs brown up as they sit.  The meatballs on the right are the ones that were sitting while the ones on the left just came out of the microwave.

TOPPING:
Stir catsup and mustard into the remaining soup mixture, still in the can. Use a soup spoon to pit a dollop of sauce over each meatball.  Return to microwave for 2 minutes.  [No waxed paper this time.]


Spoon sauce on and return to microwave.
Spoon sauce on and return to microwave for a couple minutes.


©2016, My Granny Rocks | Janette Thornton. All rights reserved.


Granny’s Potato Salad

This is one of those salads that I just throw together.  I’d never written down the recipe before.  I like lots of eggs in a creamy potato salad, so this one is heavy on the mayo.  In case you hadn’t noticed, I seldom add salt to anything (except in baking.)  When I serve this, I make sure the salt shaker is on the table and everyone’s happy.

Drain Potatoes and Rinse
Drain potatoes and rinse.  Yes Ladies, if you recognize the colander, it is that old.

4     eggs, hard boiled
5     potatoes, medium
3/4  cup celery chopped, (1 stalk)
¼    cup onion, finely chopped
3/4  cup sweet pickles, chopped
1      cup mayonnaise
1/3  cup sour cream
2    tablespoons prepared mustard
1/8 teaspoon pepper
2 tablespoons sweet pickle juice


Start the eggs cooking.  Peel potatoes and cut into ½” cubes.  Cover with water and boil until just done, about 15-20 minutes.  [Fork should go into the potato easily.  Don’t overcook or your potato salad will be mushy.]  Drain in colander and rinse with cool water.

Chopping Celery
Chopping Celery

While the eggs and potatoes are cooking, chop celery, onion and sweet pickle.  [I always cut everything into strips, then chop.]  Put in large mixing bowl.

Chopping Sweet Pickles

Eggs should be done by now.  Pour off water.  Fill pan with cool water and peel eggs under running cold water.

Chopped Egg
Chopped Egg

Chop eggs.

Add eggs and potatoes to other ingredients in mixing bowl.  Mix well.

Mix potatoes with celery, pickle and onion.


Add mayonnaise, sour cream, mustard, pepper and pickle juice.  Stir until mixed well.  You can add more mustard for your particular tastes.

Level salad in bowl.  My mom always sprinkled hers  with paprika for color.

Salad - ready to refrigerate.
Salad – ready to refrigerate.

Cover and refrigerate several hours until thoroughly chilled.


©2016, My Granny Rocks | Janette Thornton. All rights reserved.

How to Make a Perfect Baked Potato

I know the “they sayers” say you’re not supposed to store potatoes in the refrigerator.  Well, I can guarantee you, they don’t live in Arizona.  If I don’t store my potatoes in the refrigerator, they sprout quickly.  Therefore, my microwave times are based on chilled potatoes.  We all know microwaving time depends on the wattage of your microwave.  Blah, blah, blah.  Back to the potato…once things heat up here, I don’t like to use my oven in the evenings.  It seems so wrong to listen to that air conditioner hum while the kitchen is heating up from the oven, but I love baked potatoes.  Here’s how I speed up the cooking process.

Start with a couple nice, medium to large-sized, russet potatoes.  Scrub well with cool water to remove surface dirt and clean the skin.  [I use a washcloth to scrub mine.]  Microwave two potatoes on high for 3 minutes.  Turn and poke with a fork.  Microwave another 3 minutes.  Check doneness with a fork.  Your fork should go in without much resistance.  If not, microwave another minute or two until fork pierces potato easily.

While the potatoes are nuking, tear off a square of aluminum foil for each potato.  Splash olive or vegetable oil on foil. [You want enough oil to coat the entire potato skin with it.]  Roll the hot potato in the oil.  Use your hands to finish coating the potato skin with oil.  Sprinkle liberally with Kosher or Sea Salt.  Roll potato tightly in foil.

Place on the rack in your barbeque grill while you’re grilling the meat or in 350°-400° oven for 20 to 30 minutes along with whatever else you’ve got in the oven.

In the summer, I fire up the grill.  While it’s heating up, I make the potatoes, put them on a rack in the grill, then start the meat once the grill’s good and hot.  Whether in the oven or the grill, don’t forget to turn the potatoes occasionally or they’ll be petrified on the bottom.

When you’re ready to eat, start slicing the center about a half inch from the end and leave about a half inch at the end of your cut.  Gently push the ends towards the center to open the potato. Add butter, sour cream, chives, cheese, bacon bits – whatever you like.  It’s all good.

So, now you know, finishing the potato in a grill or conventional oven is the secret to the perfect baked potato.


Potato with Butter
Perfect Potato, well-done, flakey and smothered in butter.


©2016, My Granny Rocks | Janette Thornton. All rights reserved.

Molasses Oatmeal Raisin Cookies

I’m not a big fan of raisins in cookies. I don’t know why. I prefer chocolate chips over raisins every time. However, there’s something different about this recipe. I think the molasses and cinnamon compliment the raisins’ flavor nicely. This recipe tastes so much better than regular oatmeal cookies with raisins thrown in. Of course, I use Grandma’s Molasses. Actually, it’s the only kind local stores carry. I increased the flour and reduced the oven temperature from the original recipe published by Betty Crocker, General Mills (1963) Betty Crocker’s Cooky Book. New York: Golden Press. I’m thinking next time I make these, I’ll try a lower temperature and increase baking time as my oven seemed pretty hot this last go round.

These cookies bake up with crispy edges and remain moist and chewy in the center.


Grandmas Molasses
Grandmas Molasses

½ cup butter or butter-flavored Crisco
1¼ cup white sugar
2 eggs
1/3 cup molasses
2 cups all-purpose flour
1 teaspoon baking soda
1 teaspoon salt
1 teaspoon cinnamon
2 cups oatmeal, quick or old fashioned
1 cup raisins
½ cup chopped walnuts, optional


Lightly grease baking sheets. Preheat oven to 395°. Cream together shortening, sugar, and molasses. Add eggs and mix thoroughly.

Combine flour, baking soda, salt and cinnamon together. Add to creamed mixture. Mix well, then stir in oats, nuts and raisins.

Drop by rounded teaspoons about 2” apart on greased baking sheet. [I use a scoop that’s about one tablespoon. Don’t flatten these at all before baking. They spread on their own.]

Bake 6 to 8 minutes. Let cool on cookie sheet.

This makes approx. 5 dozen cookies.

Molasses Oatmeal Cookies


©2016, My Granny Rocks | Janette Thornton. All rights reserved.

Soft Frosted Sugar Cookies

This is the best sugar cookie recipe I’ve found.  I had originally discovered the recipe in A Taste of Home/Reader’s Digest Book (2007) The Taste of Home Cookbook.  Greendale, WI:  Reiman Media Group, Inc.

There’s no need for me to type it all out if it’s already available online.  Not wanting to potentially violate any copyright laws, the original recipe can be found at:

http://www.tasteofhome.com/recipes/soft-sugar-cookies

A few things I did differently are:
With the cookie dough, I used butter-flavored Crisco instead of butter.  As usual, I put the dry ingredients directly in the dough mixture.  I used a small scoop (tablespoon size) and baked the cookies for 9 minutes, then let them finish cooking on the baking sheet.  I ended up with 42 cookies.

Frosting the Cookies

With the frosting, I did use butter.  3 tablespoons of hot water worked well for me.  Once the frosting is mixed, you have to work quickly as it does form a thin crust on top.  I sprinkled a little colored sugar on a few of the pink ones.  After tasting, I decided they’re sweet enough.

Store with waxed paper between layers

I store the cookies tightly covered; placing sheets of waxed paper between the layers.  (The frosting does form a crust, but stays soft.)  Using the waxed paper keeps the lower layers looking nice.


Photos ©2016, My Granny Rocks | Janette Thornton. All rights reserved.

Pineapple and Lime Jello Dessert

Pineapple Lime jello dessert
Pineapple Lime Jello Dessert

This is an easy recipe, but definitely not quick since it takes time to chill.  I usually make it the night before I plan on serving it.  I came up with this recipe by combining the best of a couple recipes I liked.  The sour cream gives a little tarter flavor than using cream cheese alone.  If you don’t have any sour cream, leave it out and it’ll still taste good.


Graham cracker crust ready for filling

1 prepared graham cracker crust, in 2 qt. pan, See Graham Cracker Crust recipe under Granny JJ’s Recipes.
1     3 oz. package of lime Jello
1¼ cup boiling water
1    8 oz. can of crushed pineapple, optional
1    8 oz. package of cream cheese
1    cup sour cream
½  teaspoon vanilla
3    tablespoons sugar

I put the graham cracker crust in the freezer to chill until I’m ready to use it.  Here in Arizona, nothing cools quickly.  Trust me on that.

Reserved jello with pineapple

Dissolve jello in boiling water. Stir for at least 2 minutes to make sure jello completely dissolves.  Drain syrup from the can of pineapple into jello.  Put in freezer to cool.

In mixing bowl, blend cream cheese, vanilla and sugar together until creamy.  [This allows the jello a little time to cool in the freezer.]

Reserve ½ cup jello in a glass measuring cup.  Add drained pineapple to this reserved jello.  Set aside on countertop.
Do NOT refrigerate.

Cream cheese and sour cream blended

On low speed, slowly blend jello with cream cheese mixture until thoroughly mixed.

Increase mixer speed to medium as mixture slightly thickens.  Add sour cream.  Continue mixing on medium speed until smooth.  Pour into prepared crust.  Chill until set (about 45 minutes.)

Chill until set
Chill until set

At this point, I set a timer and go on about my day.  If it sits longer in the frig than 45 minutes, that’s okay – just don’t forget about it completely.  If you do forget it for a few hours, I’d toss the reserved jello and pineapple mixture and serve as is.


Pineapple Lime Desert Pan
Pineapple Lime Desert – Ready to Chill Until Firm

Pour/float reserved jello mixture on top.  Chill until firm.


Substitutions:
Lime jello and pineapple can be replaced with orange jello and shredded carrots or leave out the pineapple and use whatever flavor jello you have on hand. It’s all good.


©2016, My Granny Rocks | Janette Thornton. All rights reserved.

Graham Cracker Crust

Crush graham crackers
Using a rolling pin to crush graham crackers.

1 package graham crackers, plain or honey
1/2 cup butter, melted*
1/3 cup sugar

Crush graham crackers with rolling pin or by pulsing in your food processor.  [I put the crackers in a plastic bag and crush them.  It’s easier than digging out my processor or blender.]  Transfer crumbs to a 2 qt. pan.  Add sugar.  Stir to distribute sugar evenly throughout crumbs.  Add butter.  Mix well.  Firmly press cracker mixture against sides and bottom with spoon or spatula.  This recipe is enough to make a 1/4 thick crust on bottom and sides of a 2 qt. pan.

Graham cracker crust ready for filling

* I actually use 1/4 cup butter to reduce the saturated fat.  The resulting crust doesn’t hold together as well since it’s not as firmly packed, but tastes just fine.

Depending on what filling you have in mind, cinnamon graham crackers can also be used for a little different taste.


©2016, My Granny Rocks | Janette Thornton. All rights reserved.